I am the fourth generation of artists in my family, and the first to make it a profession. This is the record of my ongoing journey to master the traditional and digital professions.
Wednesday, December 4, 2013
Revamps and new directions
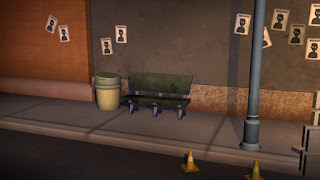
When something's not coming together, you need to look at the core of what you found interesting and work on it. The throne room wasn't coming together- I didn't know whose it was or what he/she wanted. Without that, all other things won't fall into place.
I went back, and thought of some storytelling ideas. Something most people could relate to. Here's what I came up with.
Our character,
in jail,
wanting something more.
Sunday, October 13, 2013
Wednesday, October 9, 2013
Tuesday, October 1, 2013
Machines at work.
Hello! Time for another digital work! Not finished but here we go,
First, basic black and white value thumbnails.
From there I pick a little from two pieces and switch up the vertical.
Some elements still arent' working, so I ditch the hanging cages and one of the pillars. Light comes from above and behind, both cool and warm. I also thought about various compositional elements such as the Rule of Thirds and the Golden Mean.
More soon!
First, basic black and white value thumbnails.
From there I pick a little from two pieces and switch up the vertical.
The blue light is too strong so I'm knocking it back and adding some textures. Rendering starts now as I start to refine planes/fingers/features, etc.
More soon!
Saturday, April 27, 2013
Videos!
Here's some turn around videos for the current batch of projects! We have a turn around for the mortar, the final animation that I've been working on and a zbrush turn around sculpt.
Low Polygon maya asset turn around
Maya animated short!
Final Maya sculpt
Low Polygon maya asset turn around
Maya animated short!
Final Maya sculpt
Friday, April 26, 2013
Monday, April 22, 2013
Sunday, April 14, 2013
Wednesday, April 10, 2013
Wednesday, March 20, 2013
Figure- Reposing
After resculpting several parts, making edits and proportion changes, I reposed the figure using a zbrush rig and gave him a dynamic pose. The pose should tell a story, and that will help be expressed with the environment that will be added in later. Until then you'll have to trust me. Next I created a few simple primitives in Maya and imported them in as .objs. I could make them in zbrush but that work flow was faster. Here's progress so far.
Wednesday, March 6, 2013
Tuesday, February 26, 2013
Monday, February 25, 2013
Just a reminder: Mortar and scanner were originally sculpted by Forgeworld. The make might-i-fine models.
Pictures in order, low poly, high poly, and the scenes.
Tuesday, February 19, 2013
Monday, February 18, 2013
Heavy Mortar: high poly model and first shaders
Hello!
After a lot of experimenting, tutorials and other fiddling, I've laid out my first shader networks in maya. The blue grey is a mia_material_x with a base and reflected color. I used the satined metal and preset and mixed in about 60% matt finish. From there I messed with the glossiness and the direction of the anisotropy reflection angle, and tweeked the BRDF around a bit. After that, I added in a fractal + noise for the bump maping and knocked it wayyyyy down.
The copper was a blinn, with the diffuse dropped a bit, eccentricity lowered and specular roll off rised up. Warm yellow specular color. The main color was a cloud of oranges and reds, with a modified fractal for the bump map.
And finally, the hard surface modeled mortar!
Friday, February 15, 2013
Tuesday, February 12, 2013
Wednesday, February 6, 2013
Tuesday, February 5, 2013
Monday, January 28, 2013
Sunday, January 27, 2013
Modeling schematics
Hello! I've started working on my next environment and came up with a few model sheets. Added some photoshop tom foolery to give them some appeal, and saved the basic line drawing on it's own. This is a Forgeworld (Games Workshop) Heavy Mortar figurine that I'll be placing in an WW1 type setting and modeling in Maya.
Subscribe to:
Comments (Atom)


